SELECT A VIDEO EDITING TOOL

HOW TO USE A VIDEO EDITING TOOL

To create highly engaging videos, you have to Download and Learn a Video Editing Tool. Most are quiet similar, but you need to take the time and learn the tutorials on how to use the software correctly, to build effective videos.
SIMPLE STEPS TO USING A VIDEO EDITING PROGRAM:

IMPORT THE FOOTAGE
The first step is to import the video footage you want to edit. This can be done by connecting a camera to your computer or by importing footage from your hard drive. Most video editing software will have a "Import" or "Open" option in the file menu.
ORGANIZE THE FOOTAGE
Once your footage is imported, you'll want to organize it by creating folders and subfolders to keep things organized. This way you can easily find the footage you want to use later.
CREATE A TIMELINE
Most video editing software will have a timeline where you can arrange and edit your footage. The timeline is where you'll put together your final video by adding, cutting and adjusting the footage.
EDIT YOUR FOOTAGE
The next step is to start editing your footage. You can trim footage to remove unwanted parts, split footage to create separate clips, and add transitions between clips.
ADD AUDIO
You can add audio to your video by importing music or voiceovers. You can also adjust the volume levels of the audio to get the desired effect.
ADD EFFECTS AND TEXTS
Most video editing software will have a variety of effects and text options you can use to enhance your video. For example, you can add color correction, text overlays, or special effects like slow motion.
PREVIEW AND EXPORT
Once you've finished editing, you can preview your video to make sure everything looks and sounds the way you want it to. Once you're satisfied with the final product, you can export it to a variety of formats like MP4, AVI, MOV, etc.
SHARE YOUR VIDEO
Once your video is exported, you can share it on social media, upload it to video sharing platforms like YouTube, or include it on your website.
TOP 10 VIDEO EDITING TOOLS

BASICS OF VIDEO EDITING TOOLS (Filmora)

1. Download and open the software program, 

2. Please select "New Project" 

3. and Name your project.

HOW TO USE (Filmora)

This section will discuss the 3 sections available on Filmora.
SECTION 1

CLICK NEW PROJECT

Once you have clicked the "New Project" button, a new window will appear. The first section is located on the Top Left hand, and this involves adding images, texts, templates, videos, music, and sound options. This is the library of all your visual and audio elements. This library includes default elements from Filmora and any other elements you wish to add. We will go over each menu tab in this section,
MEDIA
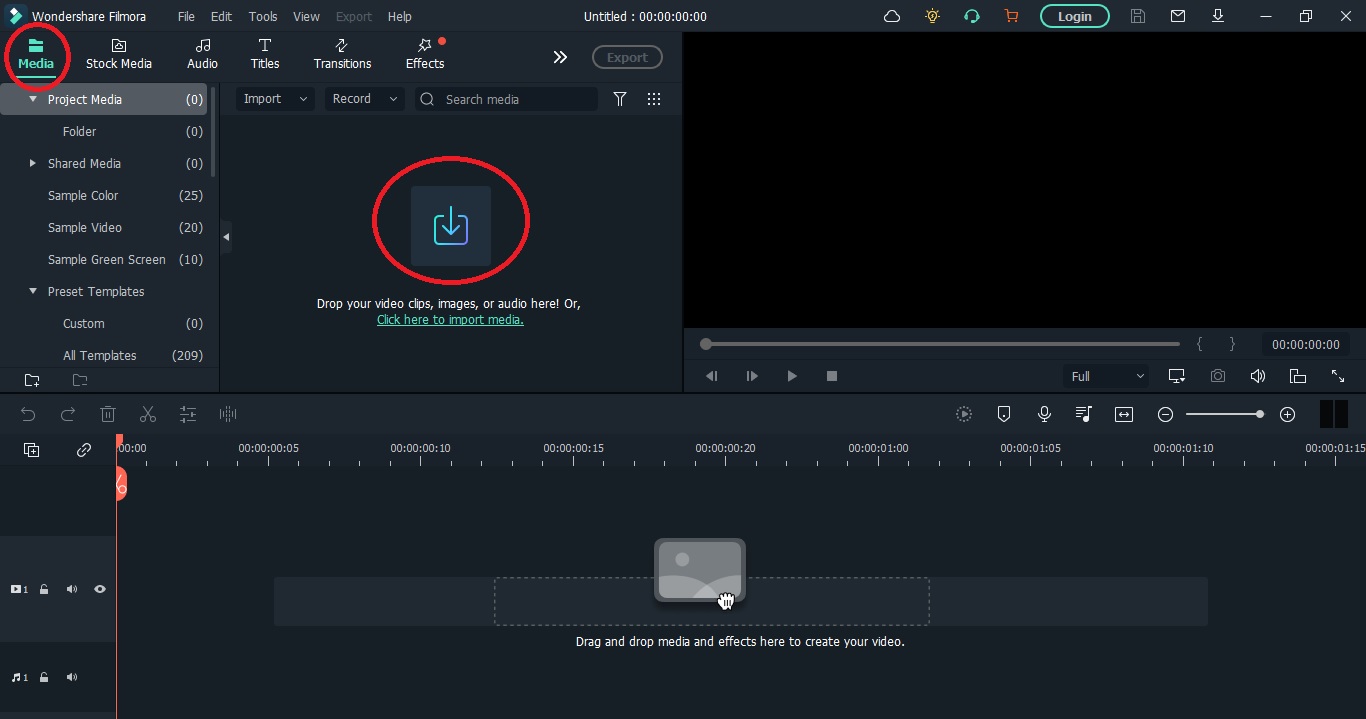
This is where you can upload media from your computer, or use existing images, videos, and music supplied by Filmora. This section contains all the resources you will use for your video.
ADD MEDIA FROM YOUR COMPUTER
Click on Media Tab - - Select Project Media - - Click Import Media - - Select the Media you want
STOCK MEDIA
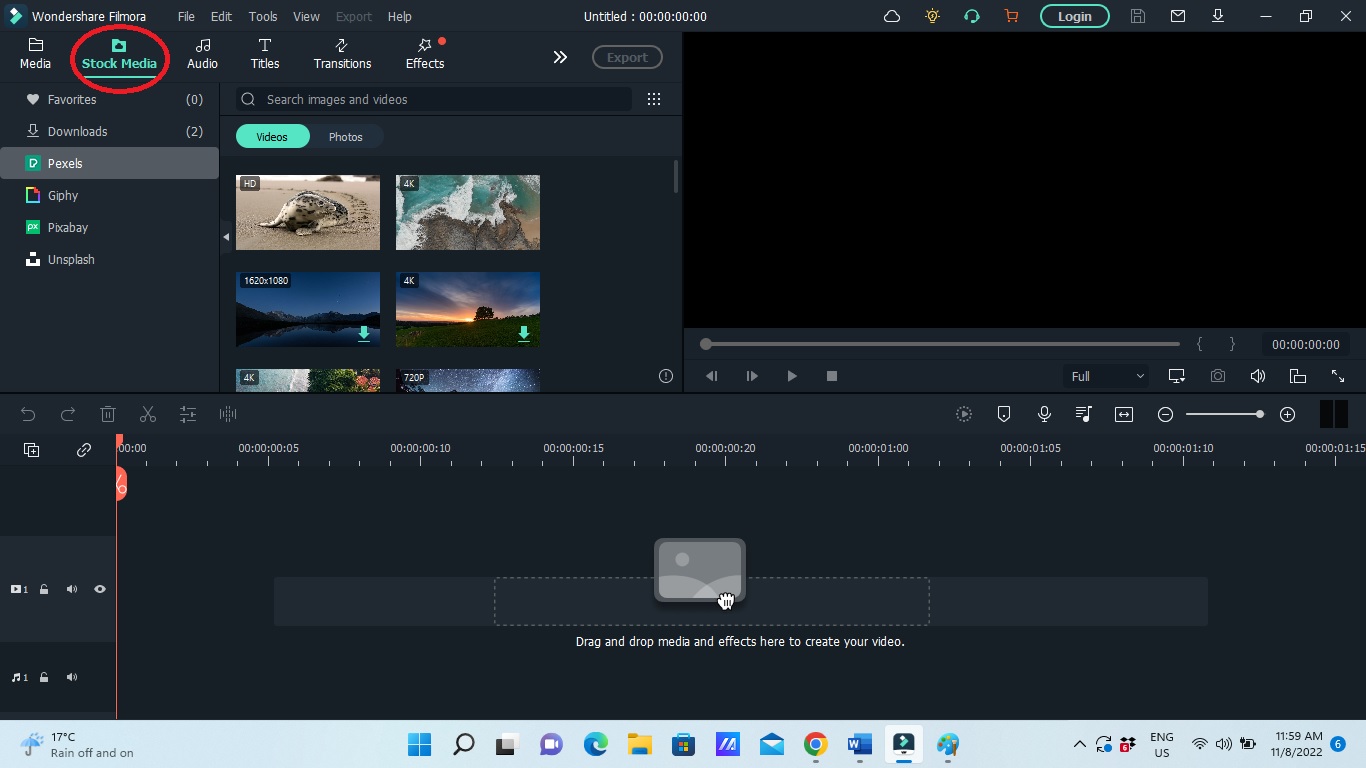
The Stock Media section allows you to chose and downloand images, gifs and videos from popular media websites.
Pexels
Giphy
Pixabay
Unsplash
ADD MEDIA FROM FILMORA
Click on Stock Media Tab - - Select Pexels - - Select a Video - - Now click the Download Icon on the image - -  Find the Image under Downloads.
AUDIO
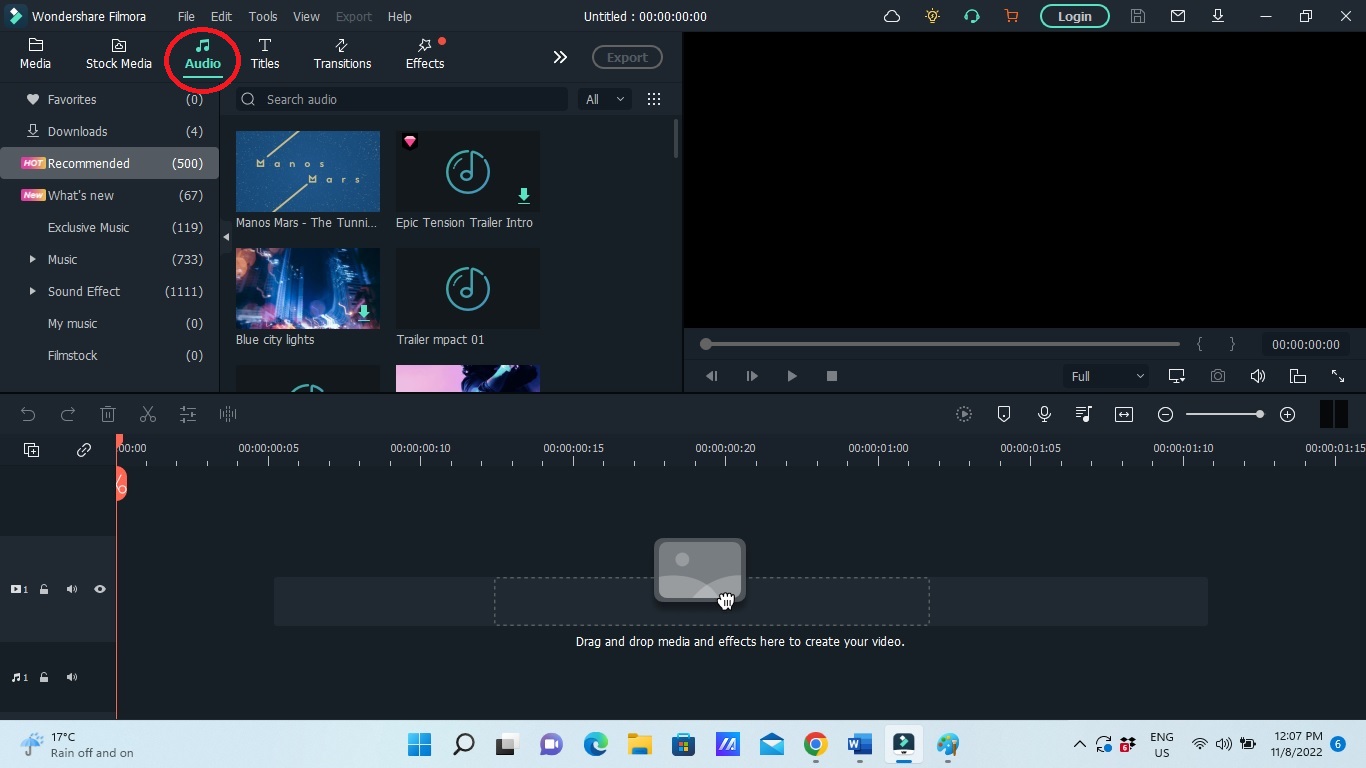
The Audio section allows you to choose from a large library of Filmora sounds for your videos. You can also add your own sound options by going to Downloads.
Music options
Sounds options
Sounds effect options
TITLES
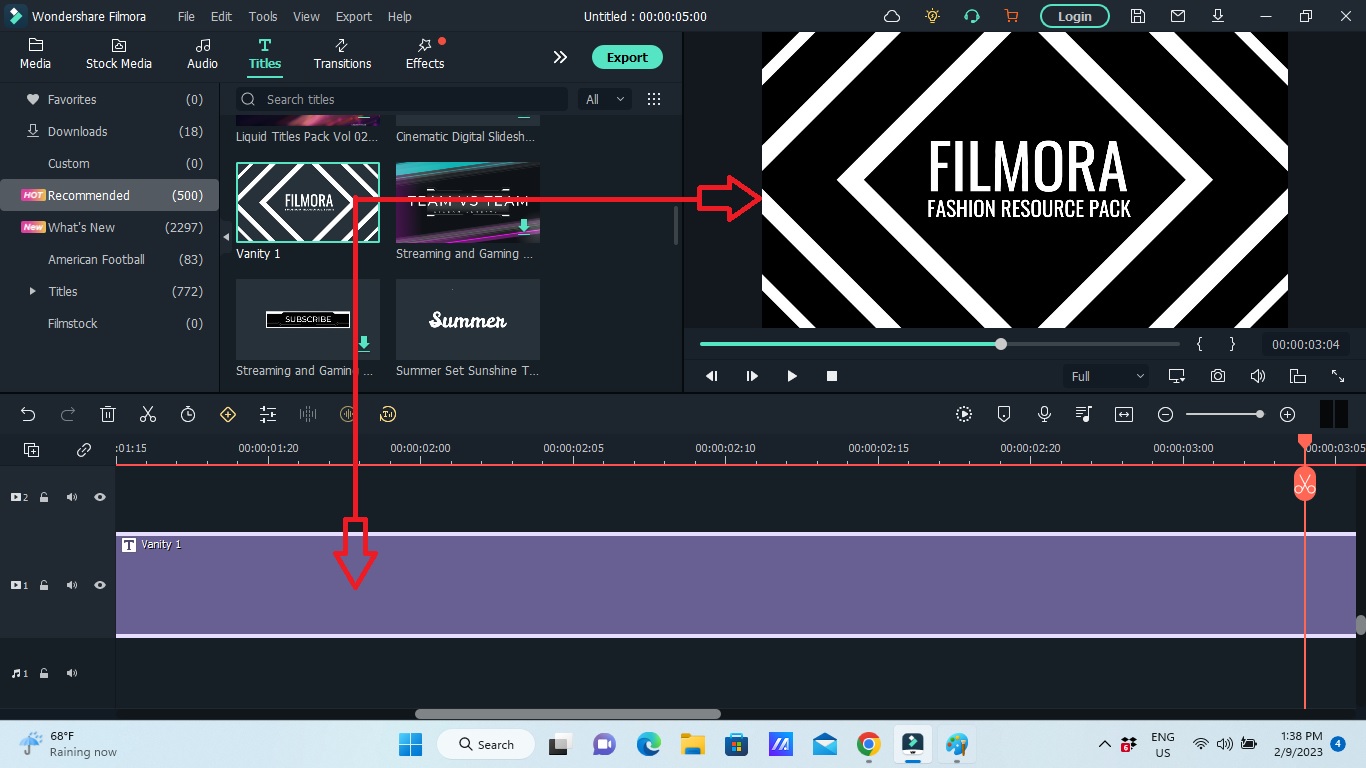
This option allows you to Add Titles and Texts to your videos. These titles can be on a plain white or black background, or they can overlap on an existing video clip.
TRANSITIONS
These are video clips that are used in between scene changes. It transitions from one scene to the next scene. Filmora has a large library of transitions you can select from.
EFFECTS
Effects are small visual and audio effects added to the video. These effects can by anything from making the video black and white, shaking the video, adding speed lines, or anything animation.
SECTION 2

ADD MEDIA TO YOUR EDITING SECTION

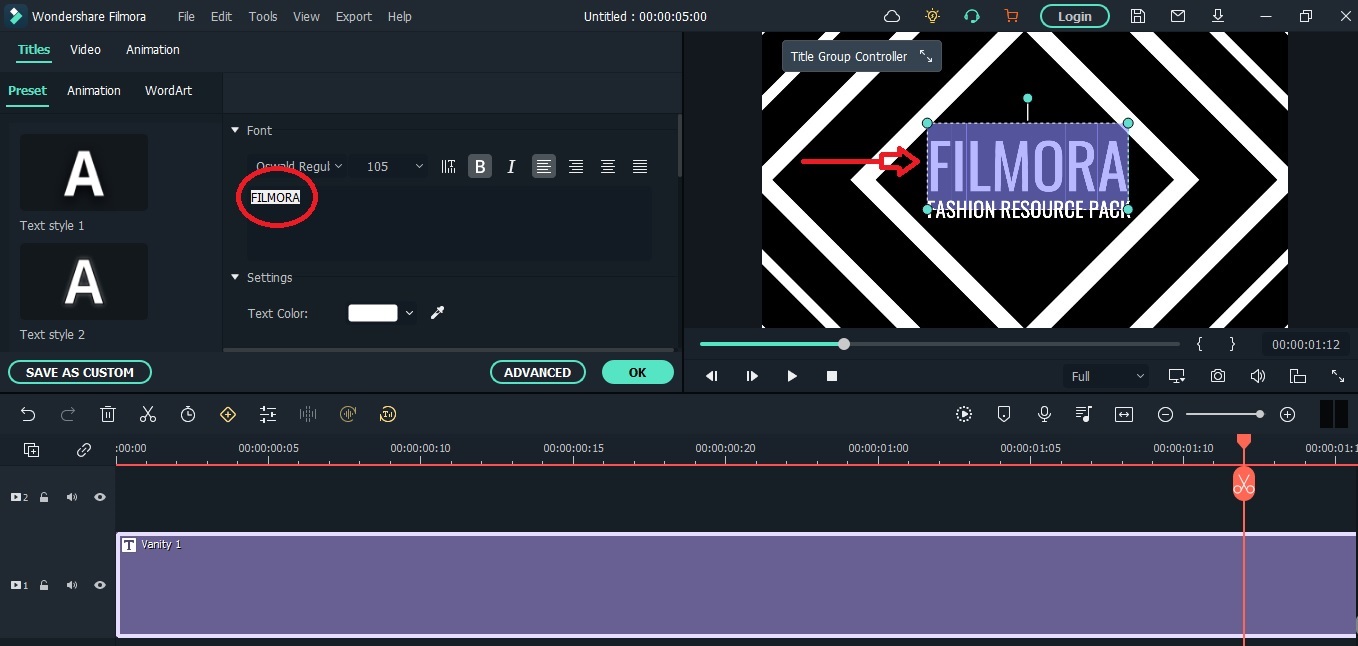
The editing section is located on the Top Right hand side of the screen. It allows you to add Videos, Titles, Effects, Images and Audios to it. You can also edit and resize the media as desired.
INSTRUCTIONS
Select a media from Filmoras library or upload one yourself.
Click on the download icon on the bottom left of the media you selected.
Once your downloaded has completed, click the + Icon which appears in the same location as the download icon.
Now your media will appear both on your editing section and timeline (Bottom section of filmora)
Now, you can edit the media in the editing section by resizing the it, and editing some of the elements displayed on the media.
NOTE
You can only edit the media if it is displayed on the timeline too. This is done by clicking the + Icon.
SECTION 3

THE TIMELINE

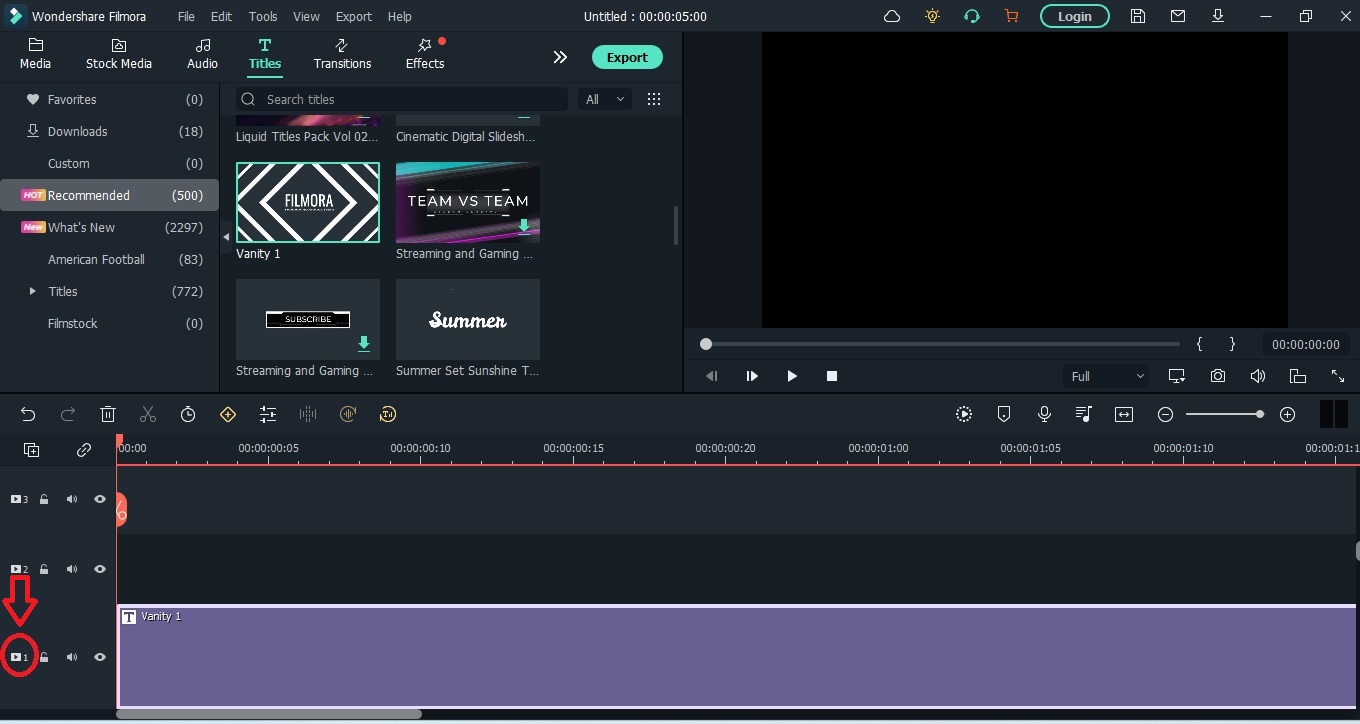
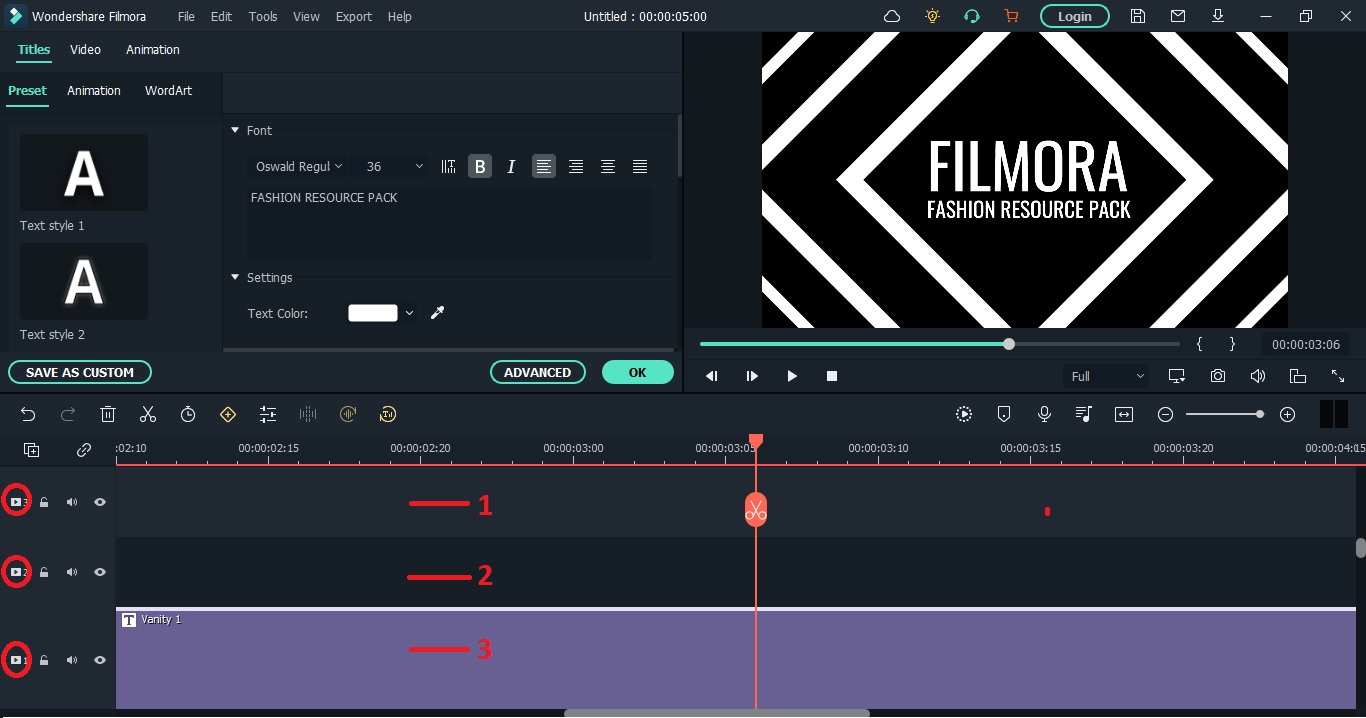
This is the timeline section located at the bottom of your screen and displays your entire video. It involves putting the Video and Audio elements in the Order you want. This section is where your video is created. On every new project, there are two tracks evident.
Visual Track
Audio Track
VISUAL TRACK
The visual track is the first track and has a Play Icon displayed next to it. 
You can either push the +Plus icon to add One Visual Element to your visual timeline.
Or you can drag and drop Visual elements direcly from your library to your visual timeline to add multiple visual elements that overlap.
You can add multiple visual tracks in the same timeframe allowing video clips to overlap each other.
AUDIO TRACK
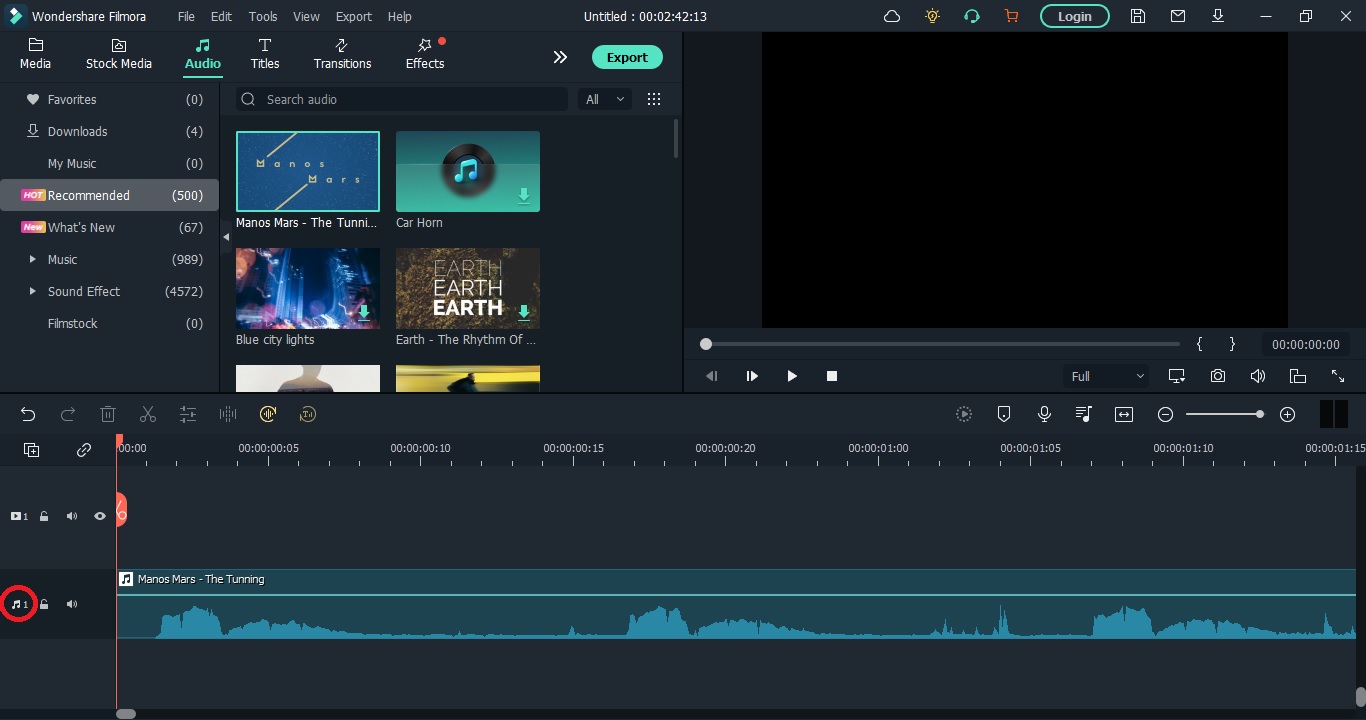
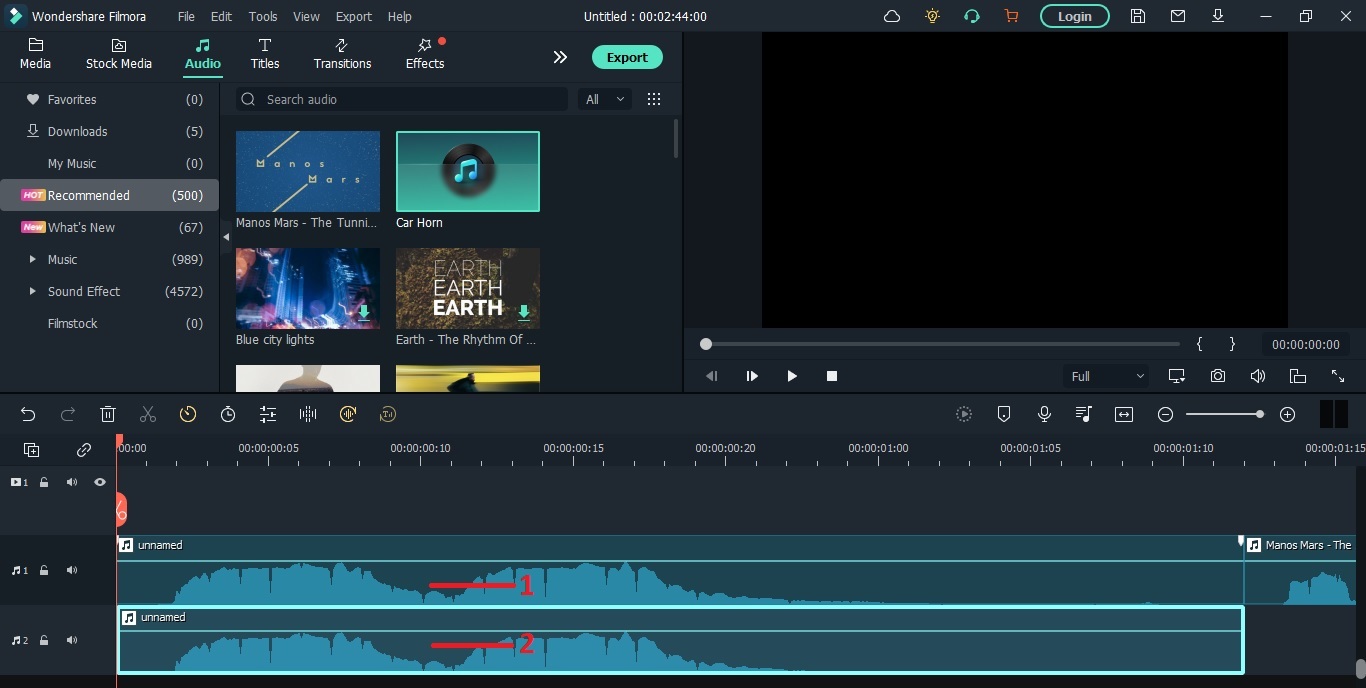
The audio track is found right below the Visual Track and has the Music Icon displayed next to it. 
You can either push the +Plus icon to add One Audio Element to your audio timeline.  a
Or you can drag and drop Audio elements direcly from your library to your audio timeline to add multiple Audio elements
You can add multiple visual tracks in the same timeframe allowing video clips to overlap each other.

CONCLUSION

Please go through the tutorials, and learn all the different elements available to you in the library. 
linkedin facebook pinterest youtube rss twitter instagram facebook-blank rss-blank linkedin-blank pinterest youtube twitter instagram